The Ultimate Guide on How to Create & Sell your Online Course [Free Webinar Included]
A while ago, I hosted an online webinar on how to build and sell your online course.
Even though it was my first-ever webinar on the topic, it was very well received by our members inside KREW – our community of entrepreneurs I hosted the webinar for.
Today, I feel it’s about time to share this knowledge with a wider audience in my very first Ultimate Guide. I call it an ultimate guide, because it touches on a lot of different aspects of course creation – many more than I would cover in a regular article.
This guide is for beginners, but even though I consider myself a “veteran” course creator by now, I still find it very helpful to go back to the basics every so often. Plus, I share some of my own strategies and tools which may be helpful for you as well.
You can either view the webinar above, or read on below for the full written guide with key takeaways from the webinar and more.
Overview
1. Why build an online course?
2. The online course flywheel
3. Pilot versus evergreen
4. Direction
5. Design: Platform
6. Design: Curriculum
7. Design: Content
8. Sales
9. Iterate
10. Summary
1. Why build an online course? 🤔
To me, there are several reasons why someone could consider creating an online course:
🎯 To build an additional or “passive” income stream
🎯 To generate leads for an existing product
🎯 To establish yourself as an authority in a certain field
🎯 To free up more time by decreasing 1-on-1 contact with clients
🎯 To have a positive impact on the world
🎯 All of these are valid reasons.
What’s important is that you know why you want to build an online course. Because that’s going to influence a lot of the decisions you will make along the path of creating and selling your online course.
More importantly, it will keep you motivated.
Creating a course is hard work. It’s complex. What you’re doing, in essence, is taking a sea of knowledge and expertise and distilling that into something that’s both easy to consume and understand by your audience.
You’ll need a why to keep you moving forward through that process, to actually finish your course and put it online 🚀💪
So if you’re interested in creating an online course, I challenge you to write down the main reason why you want it. Do it right now. Put it on your wall if you want to. You’re going to be committing to a process of weeks, months or even years. And that little piece of paper is going to pull you through it.
2. The online course flywheel 🎡
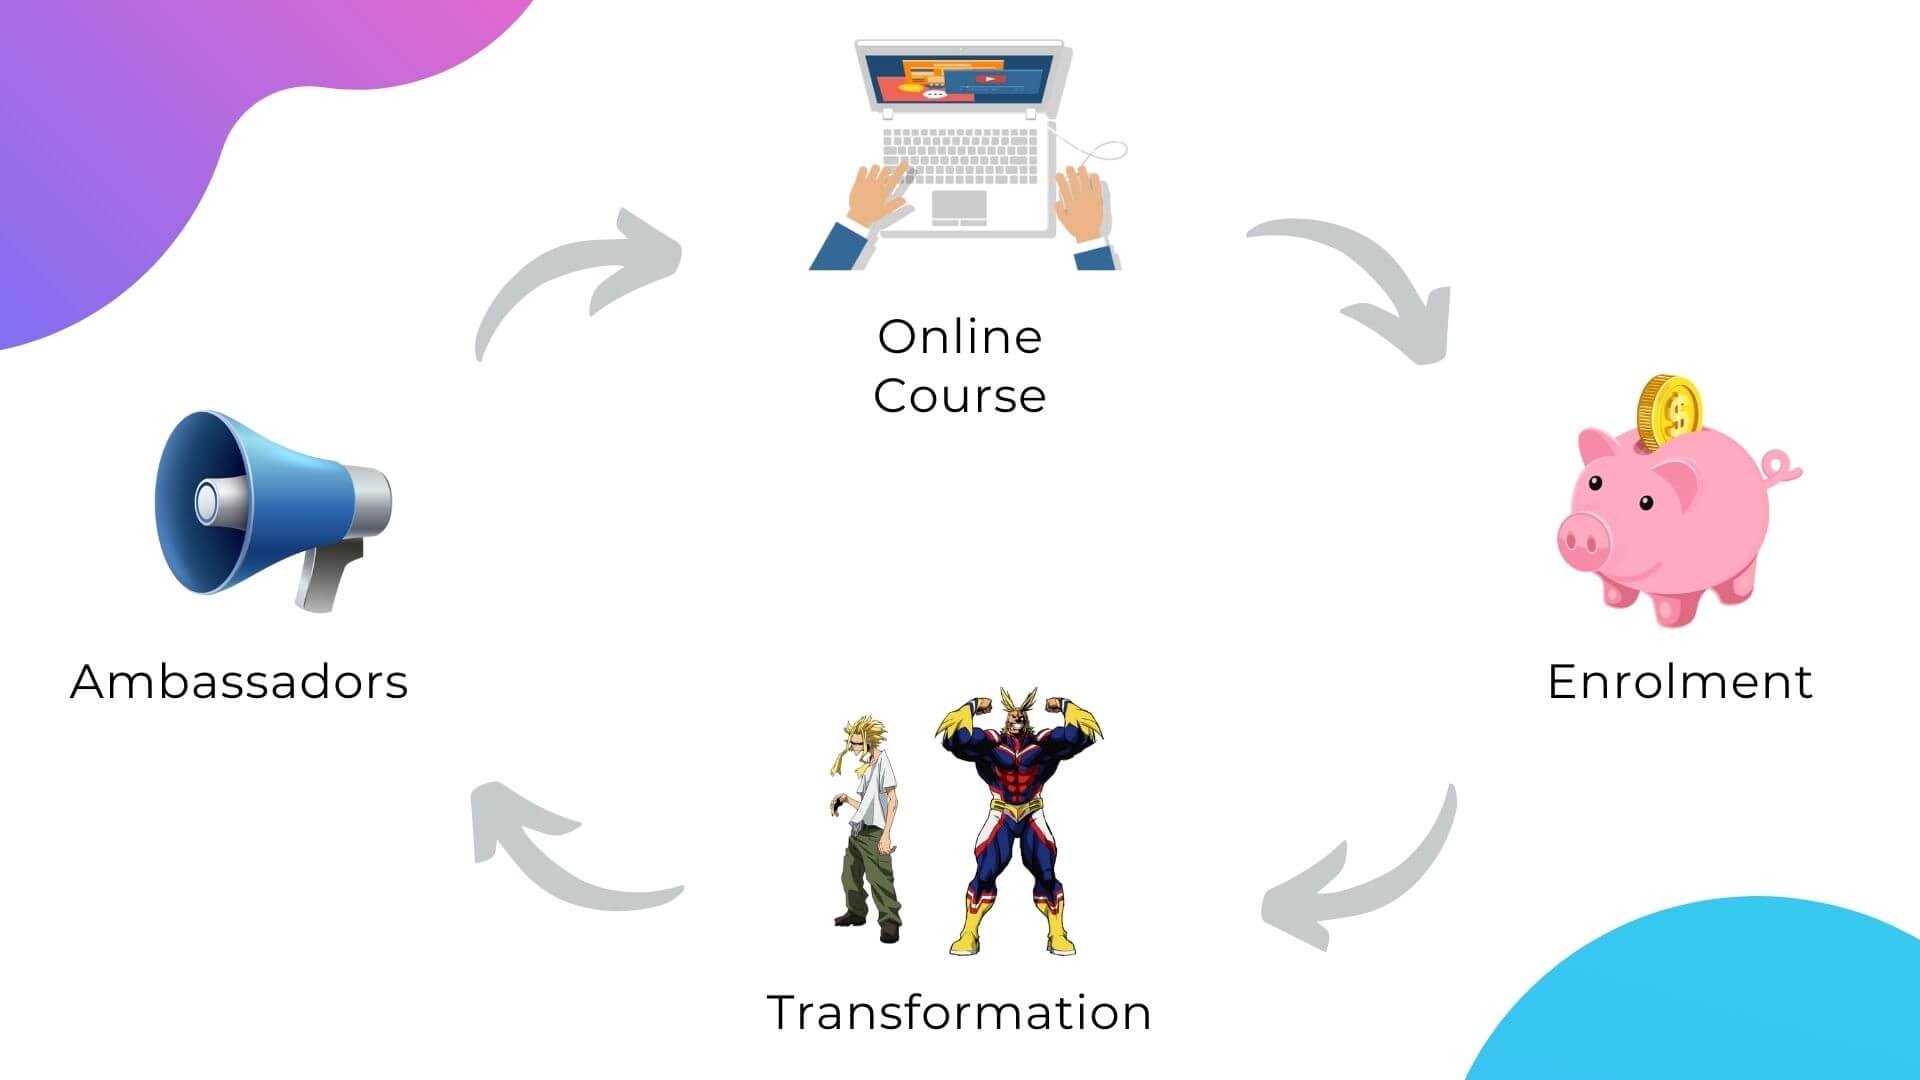
Once you know your ‘why’, it’s important to understand what makes an online course great. For that, I like to use this flywheel graphic.
It’s a flywheel for two reasons.
☝️ Building a course is an iterative process. You’ll have to learn and improve based on the feedback you’re getting from your (potential) customers constantly.
✌️ Flywheels build momentum over time. At the start, it’s slow to keep it going, but as you keep improving, your course has the potential to essentially ‘run’ on its own.
The flywheel has four parts: online course, enrollment, transformation and ambassadors.
The online course is the course itself – what you’ll build. Enrollment is when someone signs up for your course. Transformation is the transformation people went through once they completed the course. And finally, ambassadors are what some of these transformed people will become if they are happy with their transformation.
Your top priority is to create ambassadors. Ambassadors tell other people about the value of your course, which brings in new people who will enroll. To create ambassadors, you will need to pay attention to all three other aspects of the flywheel.
I’ve seen it happen so often that people spend months or even years on creating an online course, only to be disappointed. Because no one ever enrolls 🥲
It’s important to realise that creating an online course is only part of the work. You also need to make it easy for people to find your course, to enroll, to actually transform and to tell others about their transformation.
If you pay sufficient attention to these four aspects, your online course will be a success. I’m 100 percent sure of that. Just remember that getting there is an iterative process – you will improve over time, based on the feedback of your course participants.
3. Pilot versus evergreen 📦🎁
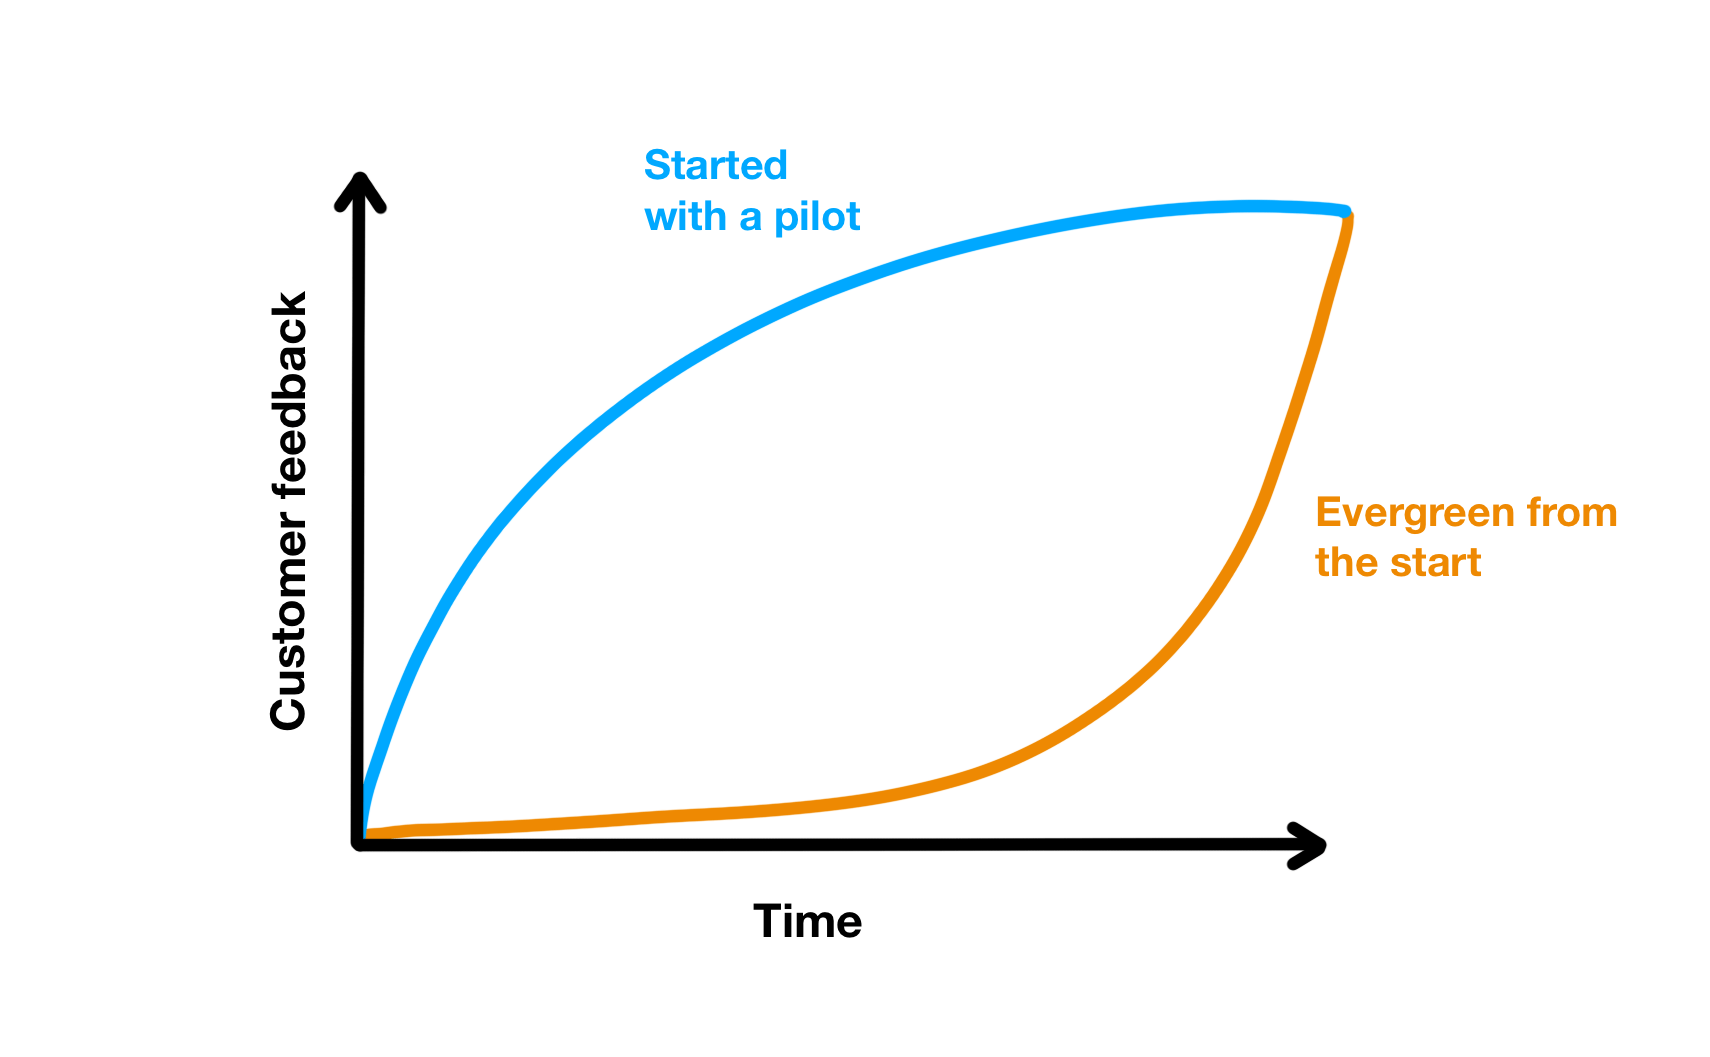
Whenever I’m going to create a new course, I like to keep my iterations as short as possible. That means creating my course in a way, so that I can get feedback on it as fast as possible.
Just think of it like this 👇
You could spend 1 year creating an online course. Writing scripts, shooting videos, editing the videos, creating workbooks… the whole thing. Only to find out after 1 year that it’s not in line with what people are looking for. Now, if you had cut that year of course creation down to 1 or several weeks, you could have prevented yourself from wasting a lot of time and effort.
That’s why I advise you to create a pilot course first: a simple, first version of your course that you can build and change quickly.
You don’t even have to create your course to start getting your first feedback. Just create an enrollment page and share the link with a small group of people. If people sign up, there’s your feedback! If people don’t, you still have work to do 💪💪
Then, to test the effectiveness of your course for your participants’ intended transformation, you could simply have a series of sessions on Zoom – without any pre-recorded videos. Once you see your sessions work and too many people are enrolling for you to be able to keep up with… that’s when you want to start thinking about creating an evergreen course.
Once you build enough momentum with your pilot course, you’re going to want to automate it as much as possible. That’s what an evergreen course is.
You’ll find that the definitions of evergreen courses differ somewhat across the web, but to me it’s simply about getting the processes in place to be able to handle larger volumes of course participants, without decreasing the transformative value of your course.
So if you still want to include live webinars or cohort-based enrollment: go ahead! Having an evergreen course doesn’t mean you have to automate absolutely everything. It just means that you turn your online course into a repeatable template, so that you can help more people in less time.
The trade-off here, of course, is that evergreen courses are much harder to change than pilot courses ⚠️
But by this point you’ll have learned so much from the feedback from your pilot course, that you can safely build a more scalable online-course system without the fear of wasting time.
4. Direction ⭐
To start building a new pilot course, you’ll need to determine the direction of the course first. To do this, I like to write something called a ‘transformation statement’.
A transformation statement drives a lot of the decisions you’ll make when creating your online course. It consists of three parts.
🙂 WHO: your ideal students
💬 TOPIC: the topic of your online course
🦸 OUTCOME: the transformation after taking your online course
You can turn this into a statement like: “My pilot course will teach [WHO] to [OUTCOME] through [TOPIC]”. If I’d turn this guide into an online course, my transformation statement could be something like:
“My pilot course will teach first-time entrepreneurs to make over €1000,- per month from their online course by creating a sales page that converts.”
Notice how my topic is only a small part of the total picture. I did that on purpose, because the urge of many first-time course creators is to teach everything about a given subject. There are a couple of problems with that approach.
⚠️ A longer course probably means longer iterations and fewer feedback.
⚠️ People tend to search for solutions to specific problems rather than broad ones.
⚠️You may feel overwhelmed or even discouraged by creating a bigger course.
Start small.
Instead of building the whole house right away, pick one room instead. Once you have a couple of rooms done, see if you can put them together. It could even become a special offer: ‘buy 1 course for €99 or buy the ultimate collection for €499’.
Starting smaller helps you figure out the real problems of your ideal students. Each of these problems can become its own course.
So to determine your direction, talk to the people you want to help. Find out what they need. What their problems are. Then share your transformation statement with them and see if they’re interested.
If they are, build your sales page (or PDF) with an offer. Show them that, and see if they are still interested. If they are, let them pay a discounted price to become an early adopter and offer feedback to help you improve the course. Before you actually built it!
You’ll find that most of them would be honoured. It’s cool to be the first of something after all… and to get a special deal 🙌
So there’s no need to feel afraid to talk to people, or to share your transformation statement with them. This first stage of course development is all about research and understanding your target audience.
If you do this well, all the other steps of creating your course will be a million times easier.
5. Design: Platform 💻
When you’ve settled on your course direction, you can start designing it.
Ideally, at this stage, you already have 10 to 20 course participants signed up as early adopters. If not, I suggest limiting your course design to what’s needed for your sales page or document only. Again, we’re going for short iterations here and we want to make sure that your course will sell. By starting to build without the confirmation that people are actually interested, you risk wasting your time.
Once you’ve established that there’s a need for your course, you can determine your platform. For most of us, there are two types of learning platforms we can choose from.
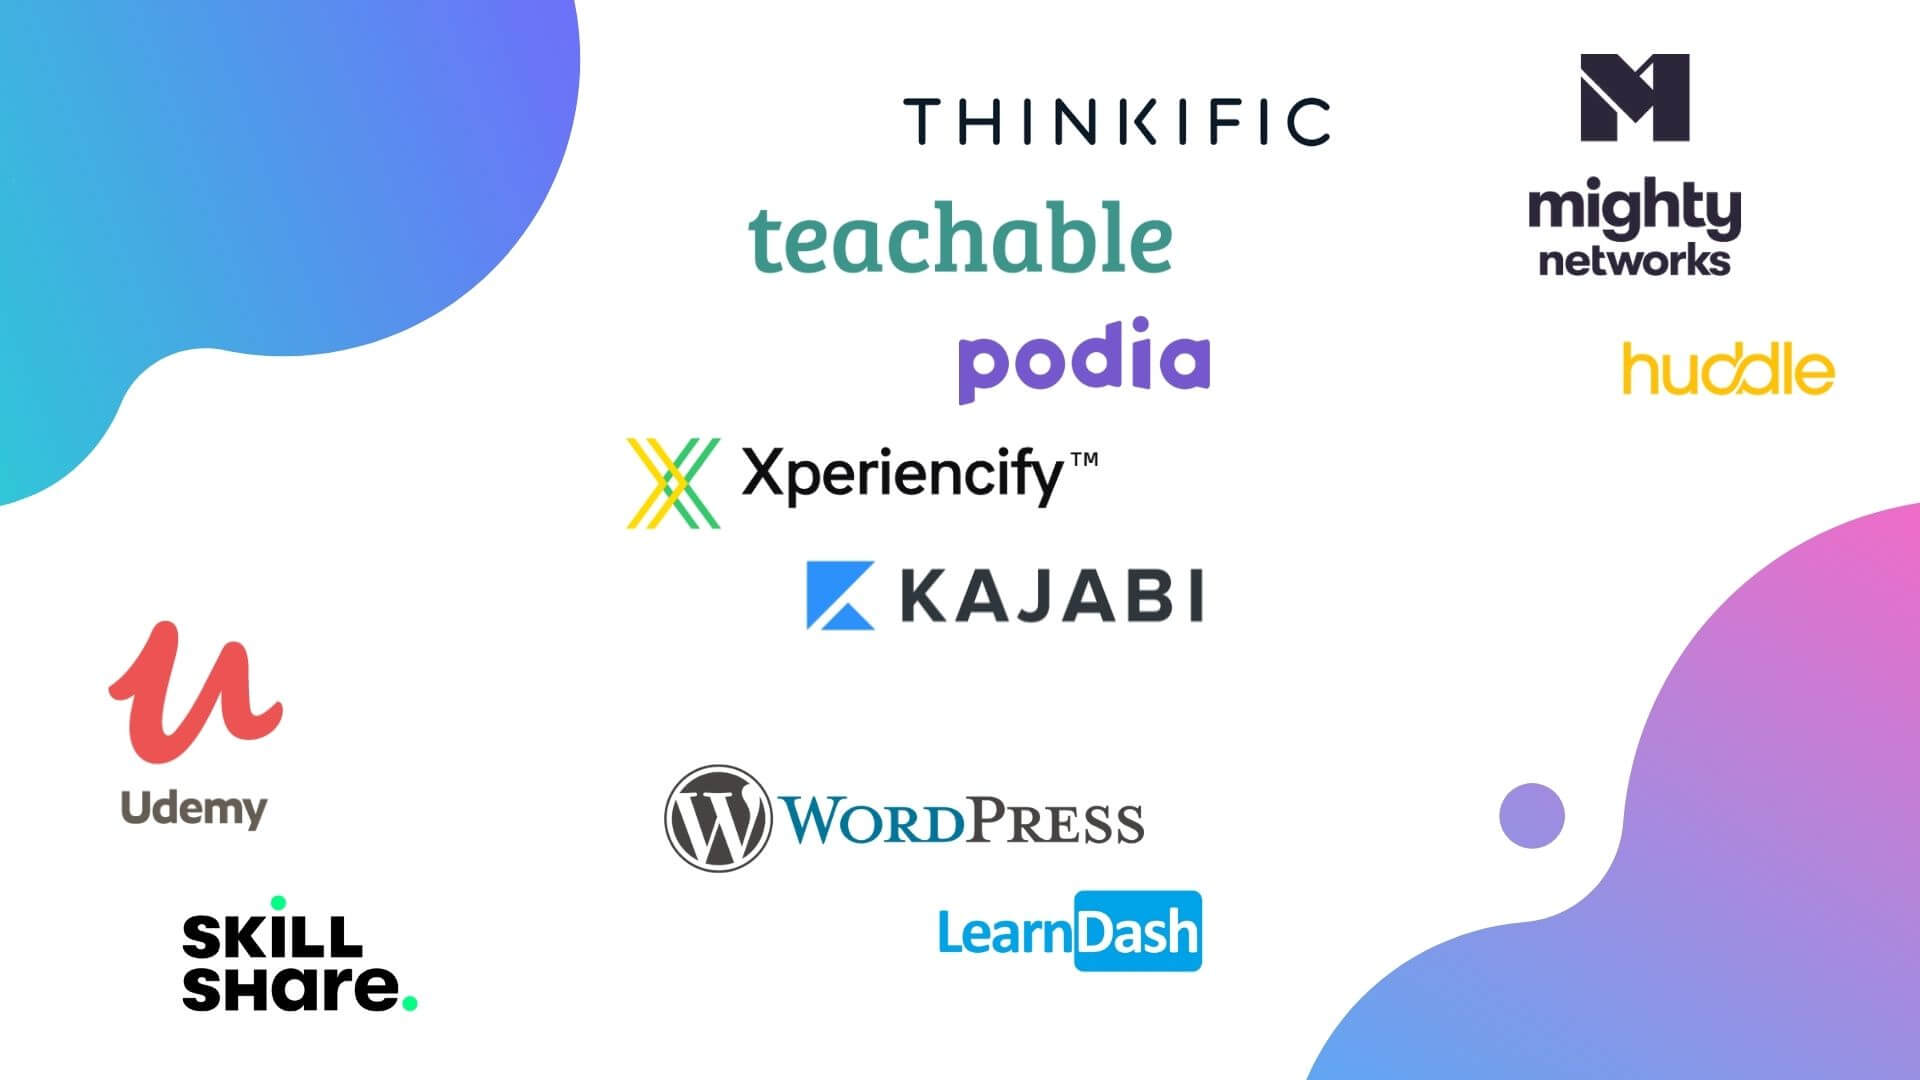
✋ Hands off: Such as Skillshare, Udemy and Coursera
🤚 Hands on: Such as Teachable, Thinkific, Xperiencify and Kajabi
The main difference between these two is in whether you’ll take an active role in doing sales yourself or not.
Of course, there are additional options such as WordPress in combination with LearnDash, or community platforms such as Circle or Mighty Networks. These could be great, but even more hands on. Plus, combining community management with online courses is a different game entirely, if you ask me.
☝️ So the first choice you have to make is: how involved do you want to be in sales? If your answer is ‘not too involved’, choose one of the hands-off platforms to start off with. If you already have a sizeable social media following or you’re confident that you can make enough sales, go with one of the hands-on platforms.
✌️ The second choice is of course: which platform are you actually going to pick? Given that a lot of these platforms are quite similar, your answer will likely depend on personal preference. But… there are a few other things you might want to consider.
Hands-off platforms already have a user base, for example. So it makes sense to check if your ideal students are part of that user base. If not, you might want to look elsewhere.
Hands-on platforms, on the other hand, offer different toolkits. For example, Kajabi includes a website builder, mailing list and course builder in one. So if you don’t like using many different tools, Kajabi is a good option. But don’t forget about your desired outcome (or transformation) either. If you serve a young audience that likes to be engaged through gamification, for example, you might want to have a look at Xperiencify.
To make the choice for the right platform easier, simply revisit your ‘why’ and your transformation statement. Then ask yourself: which platform enables these most? 🎯
6. Design: Curriculum 📖
Once you’ve made the decision on which platform to use for your online course, suddenly things become a lot easier. At least, that’s how it is for me.
Your platform determines your limitations.
While that may sound confining, it is extremely enabling. Because as people, we tend to be most creative when the borders of our possibilities are clearly defined. So the first thing I recommend is to have fun with the platform you chose. Click everything out. Learn about the possibilities and limitations. That helps you understand the toolkit at your disposal, which you’ll need to be able to design the curriculum.
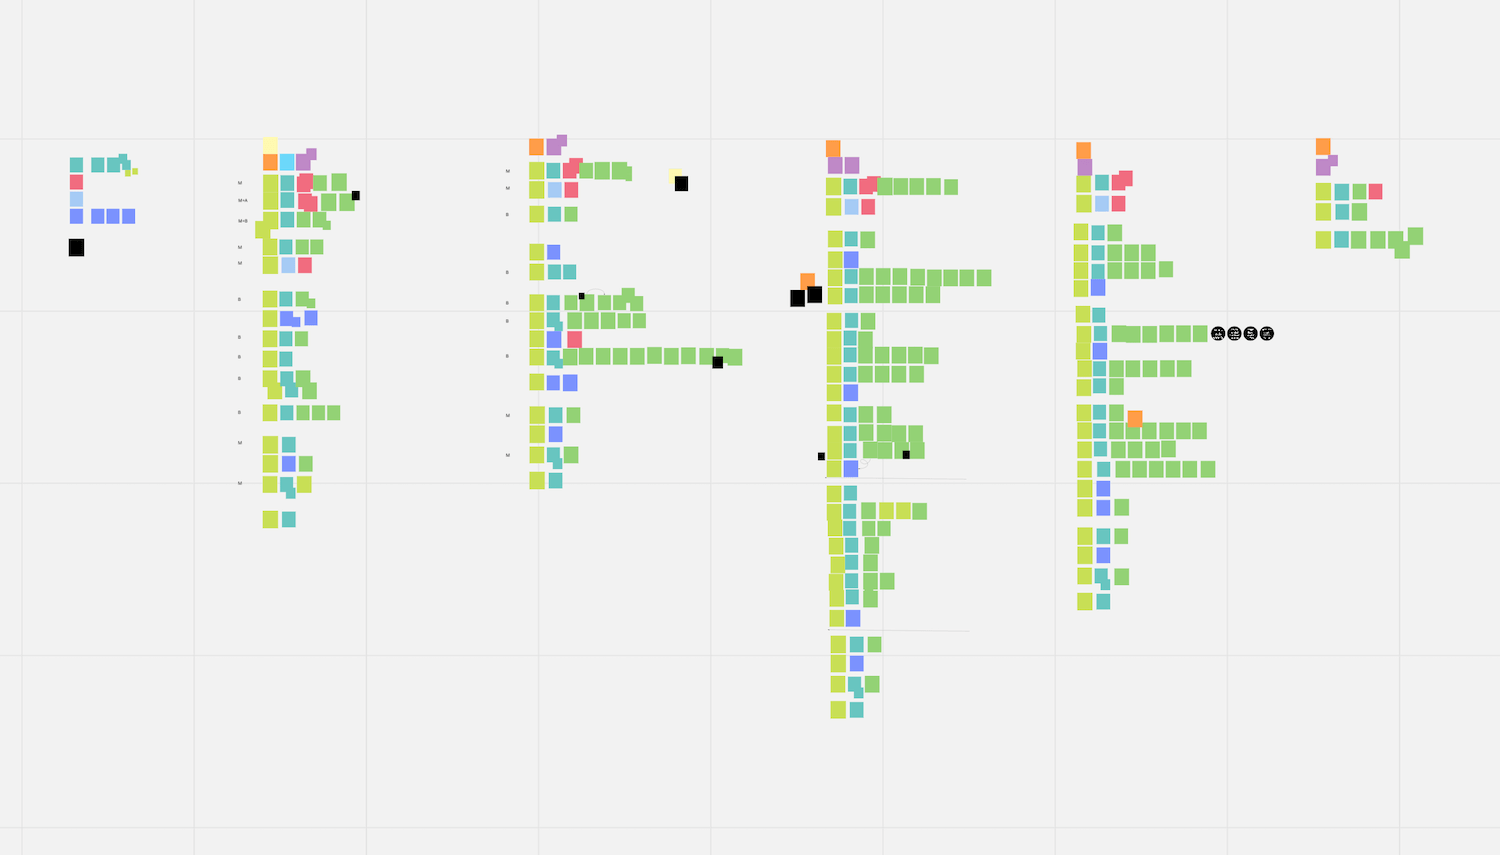
The curriculum is simply an overview of all the lessons in your online course. You could call it a course outline, but I like to look at it as the learning journey. I usually make this overview of the learning journey in a tool like Miro.
A learning bite can contain a live webinar, a pre-recorded video, an email, a text message, an audio bite, interactive exercises or links to additional resources. I always try to create a nice mix to keep engagement levels high throughout the entire course. On my Miro board, I map out which different media and exercises I’ll use, marked by different colors.
When crafting your learning journey, constantly keep your desired outcome in mind. Stick with only the learning bites that are essential to achieving this outcome. Everything else should be discarded 🤷
It’s not uncommon for me to remove 50 percent or more of the initial outline of a learning journey. After all, the best courses share only what their students need to know to achieve their desired outcome.
7. Design: Content 🎬
When the overview of your learning journey is ready enough, you can start creating the actual content for the course.
For a pilot course, that could mean creating a script with bullet points for each live session. Maybe even presentation slides, a set of emails or a workbook. For an evergreen course, this often means a lot of script writing, followed by filming and editing videos… and then uploading everything to your online platform.
It’s here where you’ll need to think most about engagement and making your course fun. In other words: you need to think about how your ideal student likes to learn best 📙🥳
From my experience, most people like short content and interactivity. For the latter, you can think about exercises, quizzes or even interactions with fellow students. To me, it’s not possible to design good learning content without knowing the ideal student, course topic and desired outcome. So once again, we’re back to the transformation statement.
If this is your first course and you’re worried about which gear to use: don’t worry. You’re starting with a pilot course, remember? It’s intended to not be “perfect” yet. You can invest in gear later when you have more students. The smartphone or laptop that you have now will do just fine. Focus on creating value first.
One way in which I like to design my content for a pilot course is by staying just one or two weeks ahead of your students.
Let’s say your pilot course is 8 weeks, for example. Once you start the course, you could only have the first 2 weeks of content ready. That means you’ll have to create the content for all the other 6 weeks while your course is in progress. There are two nice things I like about this approach.
💪 I can immediately incorporate feedback from my students.
💪 I don’t get the chance to make things perfect, but I’m forced to keep a steady pace.
I know this is not for everyone, but for a perfectionist like me it’s the perfect (hehe) way to maximise the value of my time.
8. Sales 💰
Even though sales is the 8th topic in this ultimate guide, it should be clear by now that selling already starts from the moment you draft up your first transformation statement.
Selling is essential for getting quality feedback. Even if you don’t have an online course – or even a sales page – yet.
Making a sale means that people are willing to pay for what you offer. It doesn’t matter if the sale is for €1 or €1000. It’s still entirely different from asking someone to follow your course for free. It might be tempting to offer your course for free initially, because you think you’ll be getting good feedback. But I found that to be untrue.
The reason for this is simple 👇
People who follow your course for free usually have the goal of giving you good feedback. People who pay for your course usually have the goal of transforming into the desired outcome you wrote down in your transformation statement. So the feedback you get from the second group is feedback from your ideal student – that’s the feedback that matters most. Those are the people that will turn into ambassadors eventually.
It doesn’t mean you should never offer your course for free. It can still be nice to get feedback from a trustworthy friend or family member. It just means that their feedback is not as valuable as the feedback from people you’re actually creating your course for.
Then, as for making the actual sale, there are two approaches.
📞 Personal reach-outs
⚙️ An automated funnel
Personal reach-outs are relevant in your pilot stage. In my experience, it simply means hopping on the phone with people, hearing their ambitions, their pains and then offering a bridge between the two: your online course.
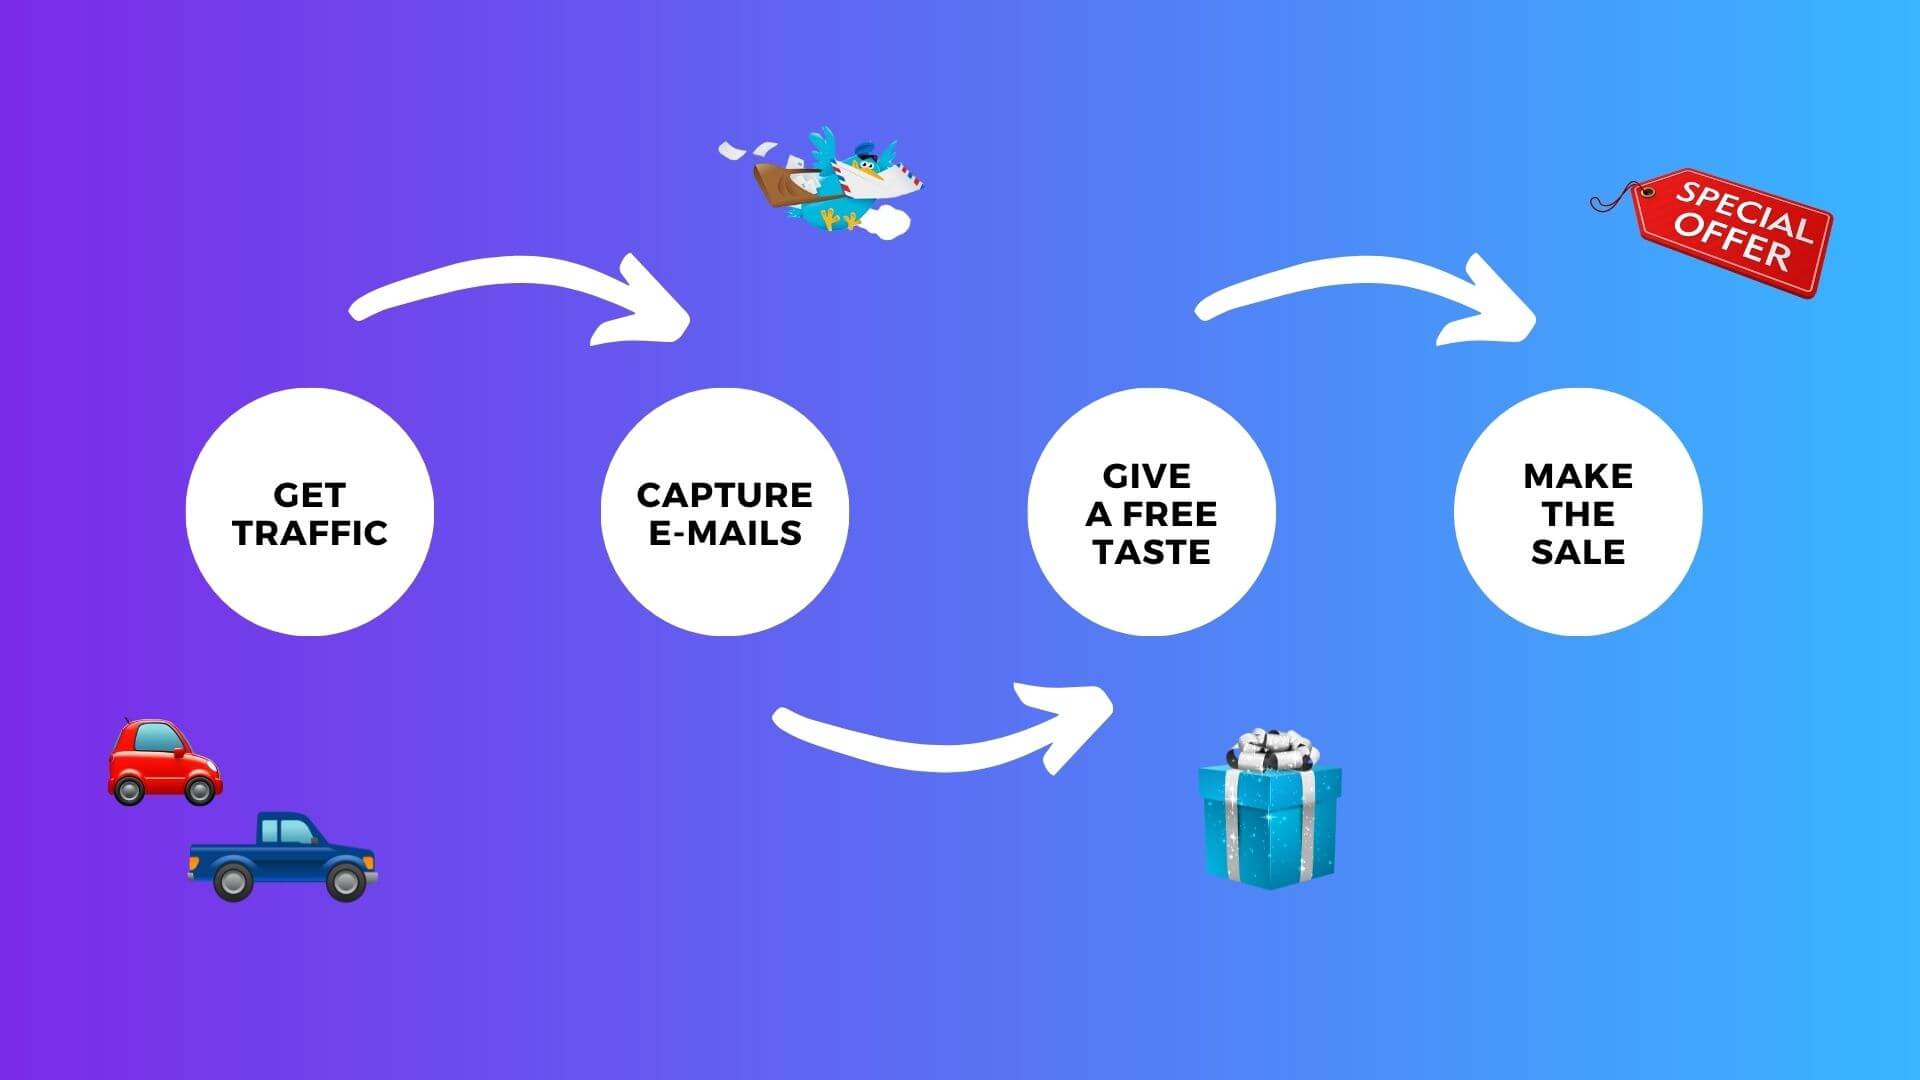
Setting up an automated sales funnel is a bit more complicated. Fortunately, there’s a ton of information about this online. One way that I’ve found works is this one.
1️⃣ Get traffic to your website
2️⃣ Capture emails for a mailing list (and send value-driven newsletters)
3️⃣ Give a free taste of your online course
4️⃣ Make the sale
It’s a lot of work, until it works. Then it’s like clockwork 😉
Once you gained people’s trust and you built a relationship through your free content, it’s time to offer them your online course. A free 1-hour webinar is a commonly used method to do so. If you want to learn more about this way of selling, I suggest reading Jab, Jab, Jab, Right Hook by Gary Vaynerchuk.
My suggestion is to keep it simple and manageable for yourself. Start small here as well and scale up over time.
Or… if you don’t want to bother with any of this, choose a hands-off platform like Udemy or Skillshare. Or just start there! Then work your way up to a hands-on platform later.
Either way, it’s never a bad idea to start sharing free value online.
9. Iterate ♻️
The final step in my ultimate guide on how to build and sell your online course is iterating.
❌ You don’t create your transformation statement once and be done with it.
❌You don’t create your online course once and be done with it.
❌ You don’t create your sales materials once and be done with them.
❌ You don’t create your ambassadors once and be done with them.
No, you keep learning and improving.
That’s how you improve the value of your online course, turn more people into ambassadors and ultimately increase your number of enrollments.
Whether you’re running a pilot course or a more evergreen course, it is a best practice to always keep iterating in order to provide the most value to your students.
In your pilot course, the improvements will likely be more content-oriented – the content of your online course. In an evergreen course, you’ll likely improve on the details more, like having a brighter button on your sales page or making it easier for your ambassadors to share your course with their friends through an affiliate program.
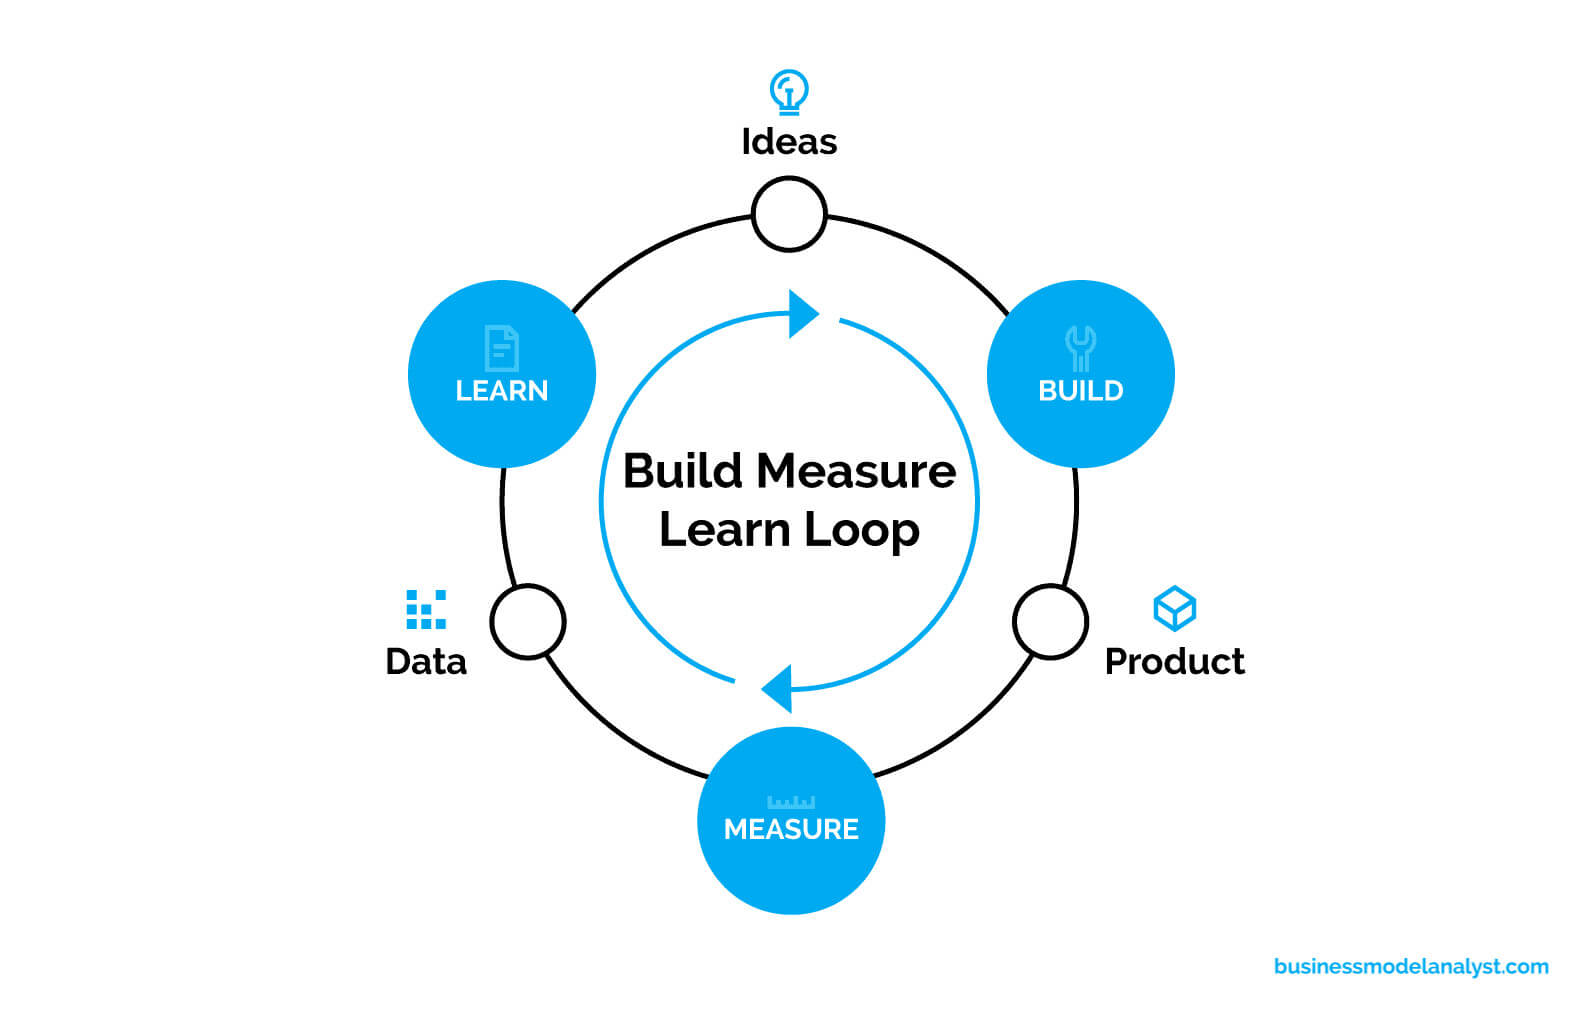
To answer the question ‘how do you iterate?’, The Lean Startup by Eric Ries suggests a three-step process that you repeat over and over.
🛠️ Building refers to anything that gets people inside your online course and helps them transform.
🔎 Measuring, on the one hand, can be done by asking for personal feedback through video calls or through short feedback forms as part of your course – I like to use a combination of both, with pilots being very heavy on video calls. On the other hand, you can (and should) measure through data and analytics. ‘Where do people drop off in your course?’, ‘What are your sales page conversion rates?’. These are the types of questions you can only answer by measuring.
🎓 Learning is about making sense of the data and determining actions to improve. It sounds simple, and it is, but to iterate properly it needs to become second nature somehow.
My most important tip: schedule time once a week to determine your actions to improve for the next one. It could be once a month too – whichever suits your pace. As you keep doing this, over time, your measurements and improvements will get better.
What matters now is that you start.
10. Summary 🚀
Here is a short summary with some of the key takeaways from this guide on how to build and sell your online course:
✅ Before you start building, know ‘why’ you want to build an online course.
✅ Don’t focus on your online course alone; focus on the 4 flywheel-steps instead.
✅ Start with a pilot course, then work your way up to a more automated course.
✅ Determine the direction of your online course with a transformation statement.
✅ Let your platform of choice inspire your course content and creativity,
✅ Create short, diverse and engaging content for your ideal student.
✅ Sell your course, even before you created it to test demand.
✅ Keep improving your online course based on data from your ideal students.
Thanks for reading this guide. I hope it has been helpful to you and that it will guide you to creating a ton of value in the future.
If you have any questions or additions to this guide, feel free to use the comments below or send me a message using this link.
Have fun creating!

0 Comments